Aug 3, 2022
Engineering
Getting the most out of Forklift

Sujin Kim
Software Engineer

Kangmin Kwon
Software Engineer
Aug 3, 2022
Engineering
Getting the most out of Forklift
Sujin Kim
Software Engineer
Kangmin Kwon
Software Engineer
Meet the Forklift: What it is
Backend.AI's Forklift is a service that automatically generates Docker container images for computational sessions and supports optimized deployment. This will be great news for those who need to configure different image environments for each target device or want to deploy but don't know how to write Dockerfiles. With Forklift, you can easily build custom images by simply setting the source and target images.
Background of Forklift's Creation
When using Backend.AI, you can utilize various features provided in computational sessions. While Backend.AI offers preset images, if users want to work with their existing images, they need to add Backend.AI-related configurations and rebuild those images. Even for those with image-related knowledge, this process is tedious and complicated. To solve this problem, the need for Forklift emerged - a service that automatically builds images through GUI or OpenAPI.
Build through Forklift
Forklift supports both OpenAPI and GUI environments. First, let's take a look at how to build in the GUI environment.
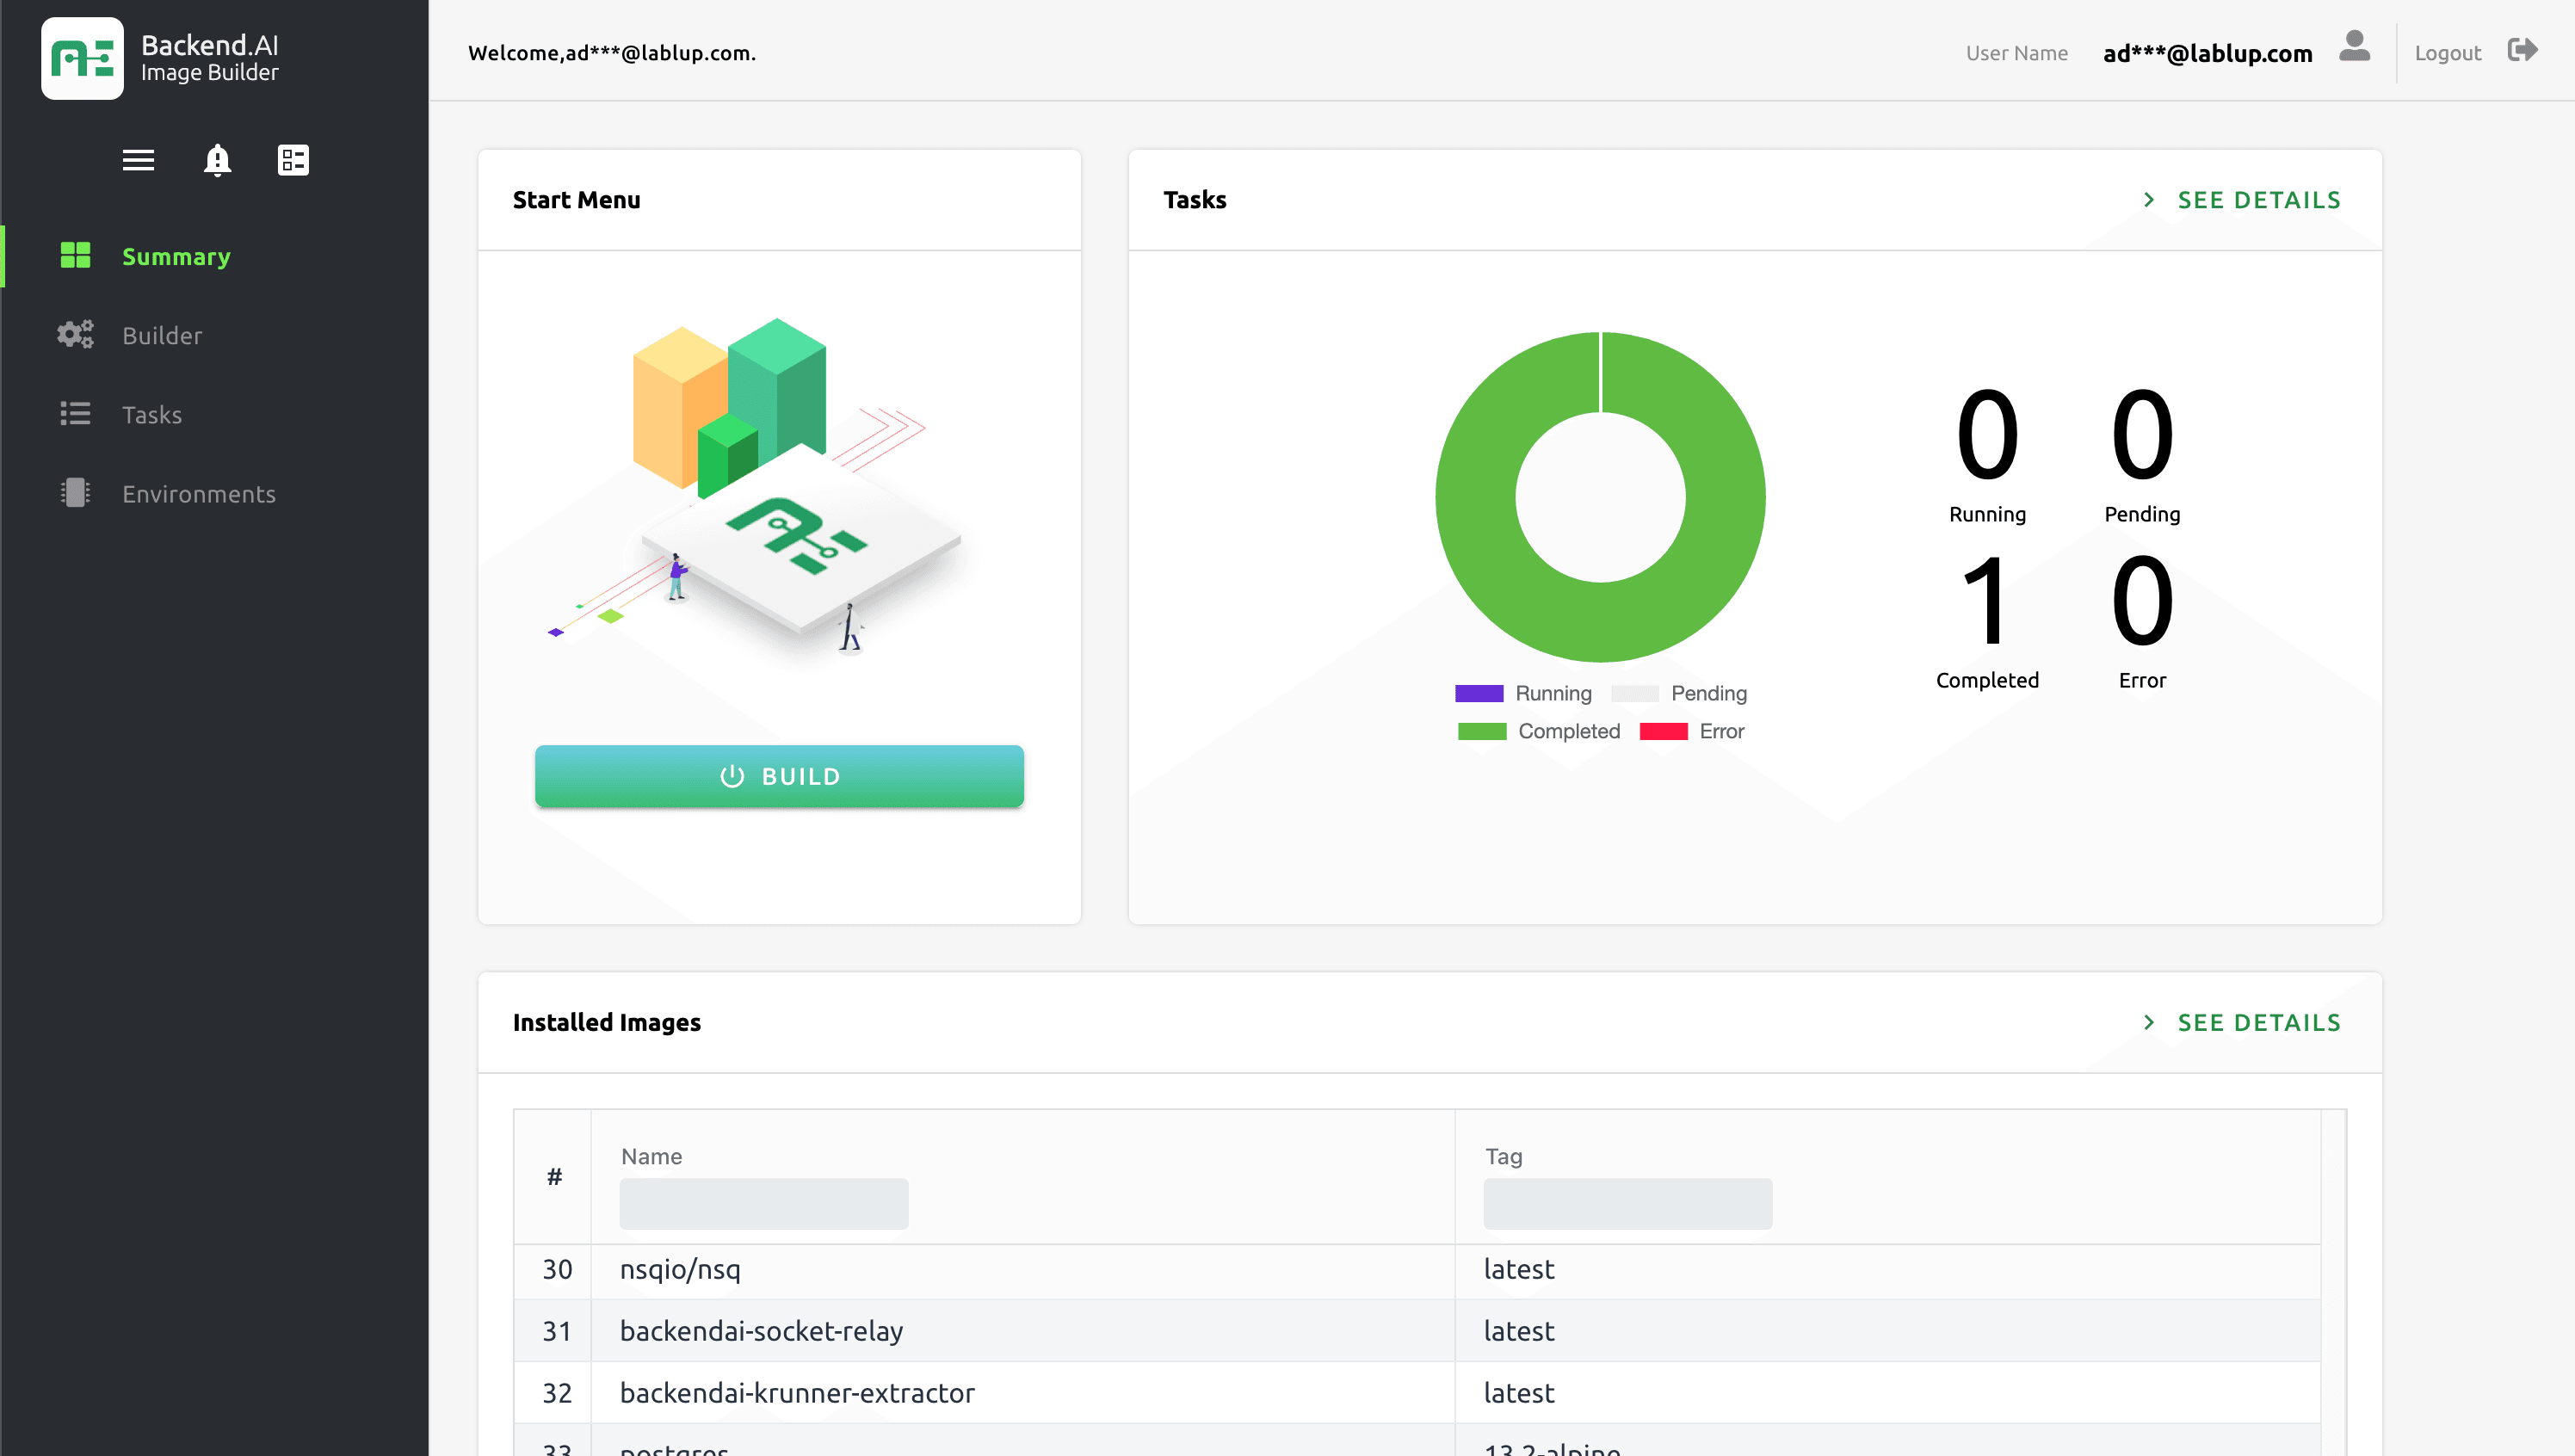
When you log in to the Forklift service, the first screen you see looks like the one described. In the top left of the Summary page, there's a Build button that takes you directly to the build page, and next to it is a chart that provides an at-a-glance view of the status of all build jobs performed so far. Below this, you can see a list of all the images that the user has installed.
To build an image, you can either click the BUILD button in the Start Menu or click on Builder in the side menu to navigate to the builder page as shown.
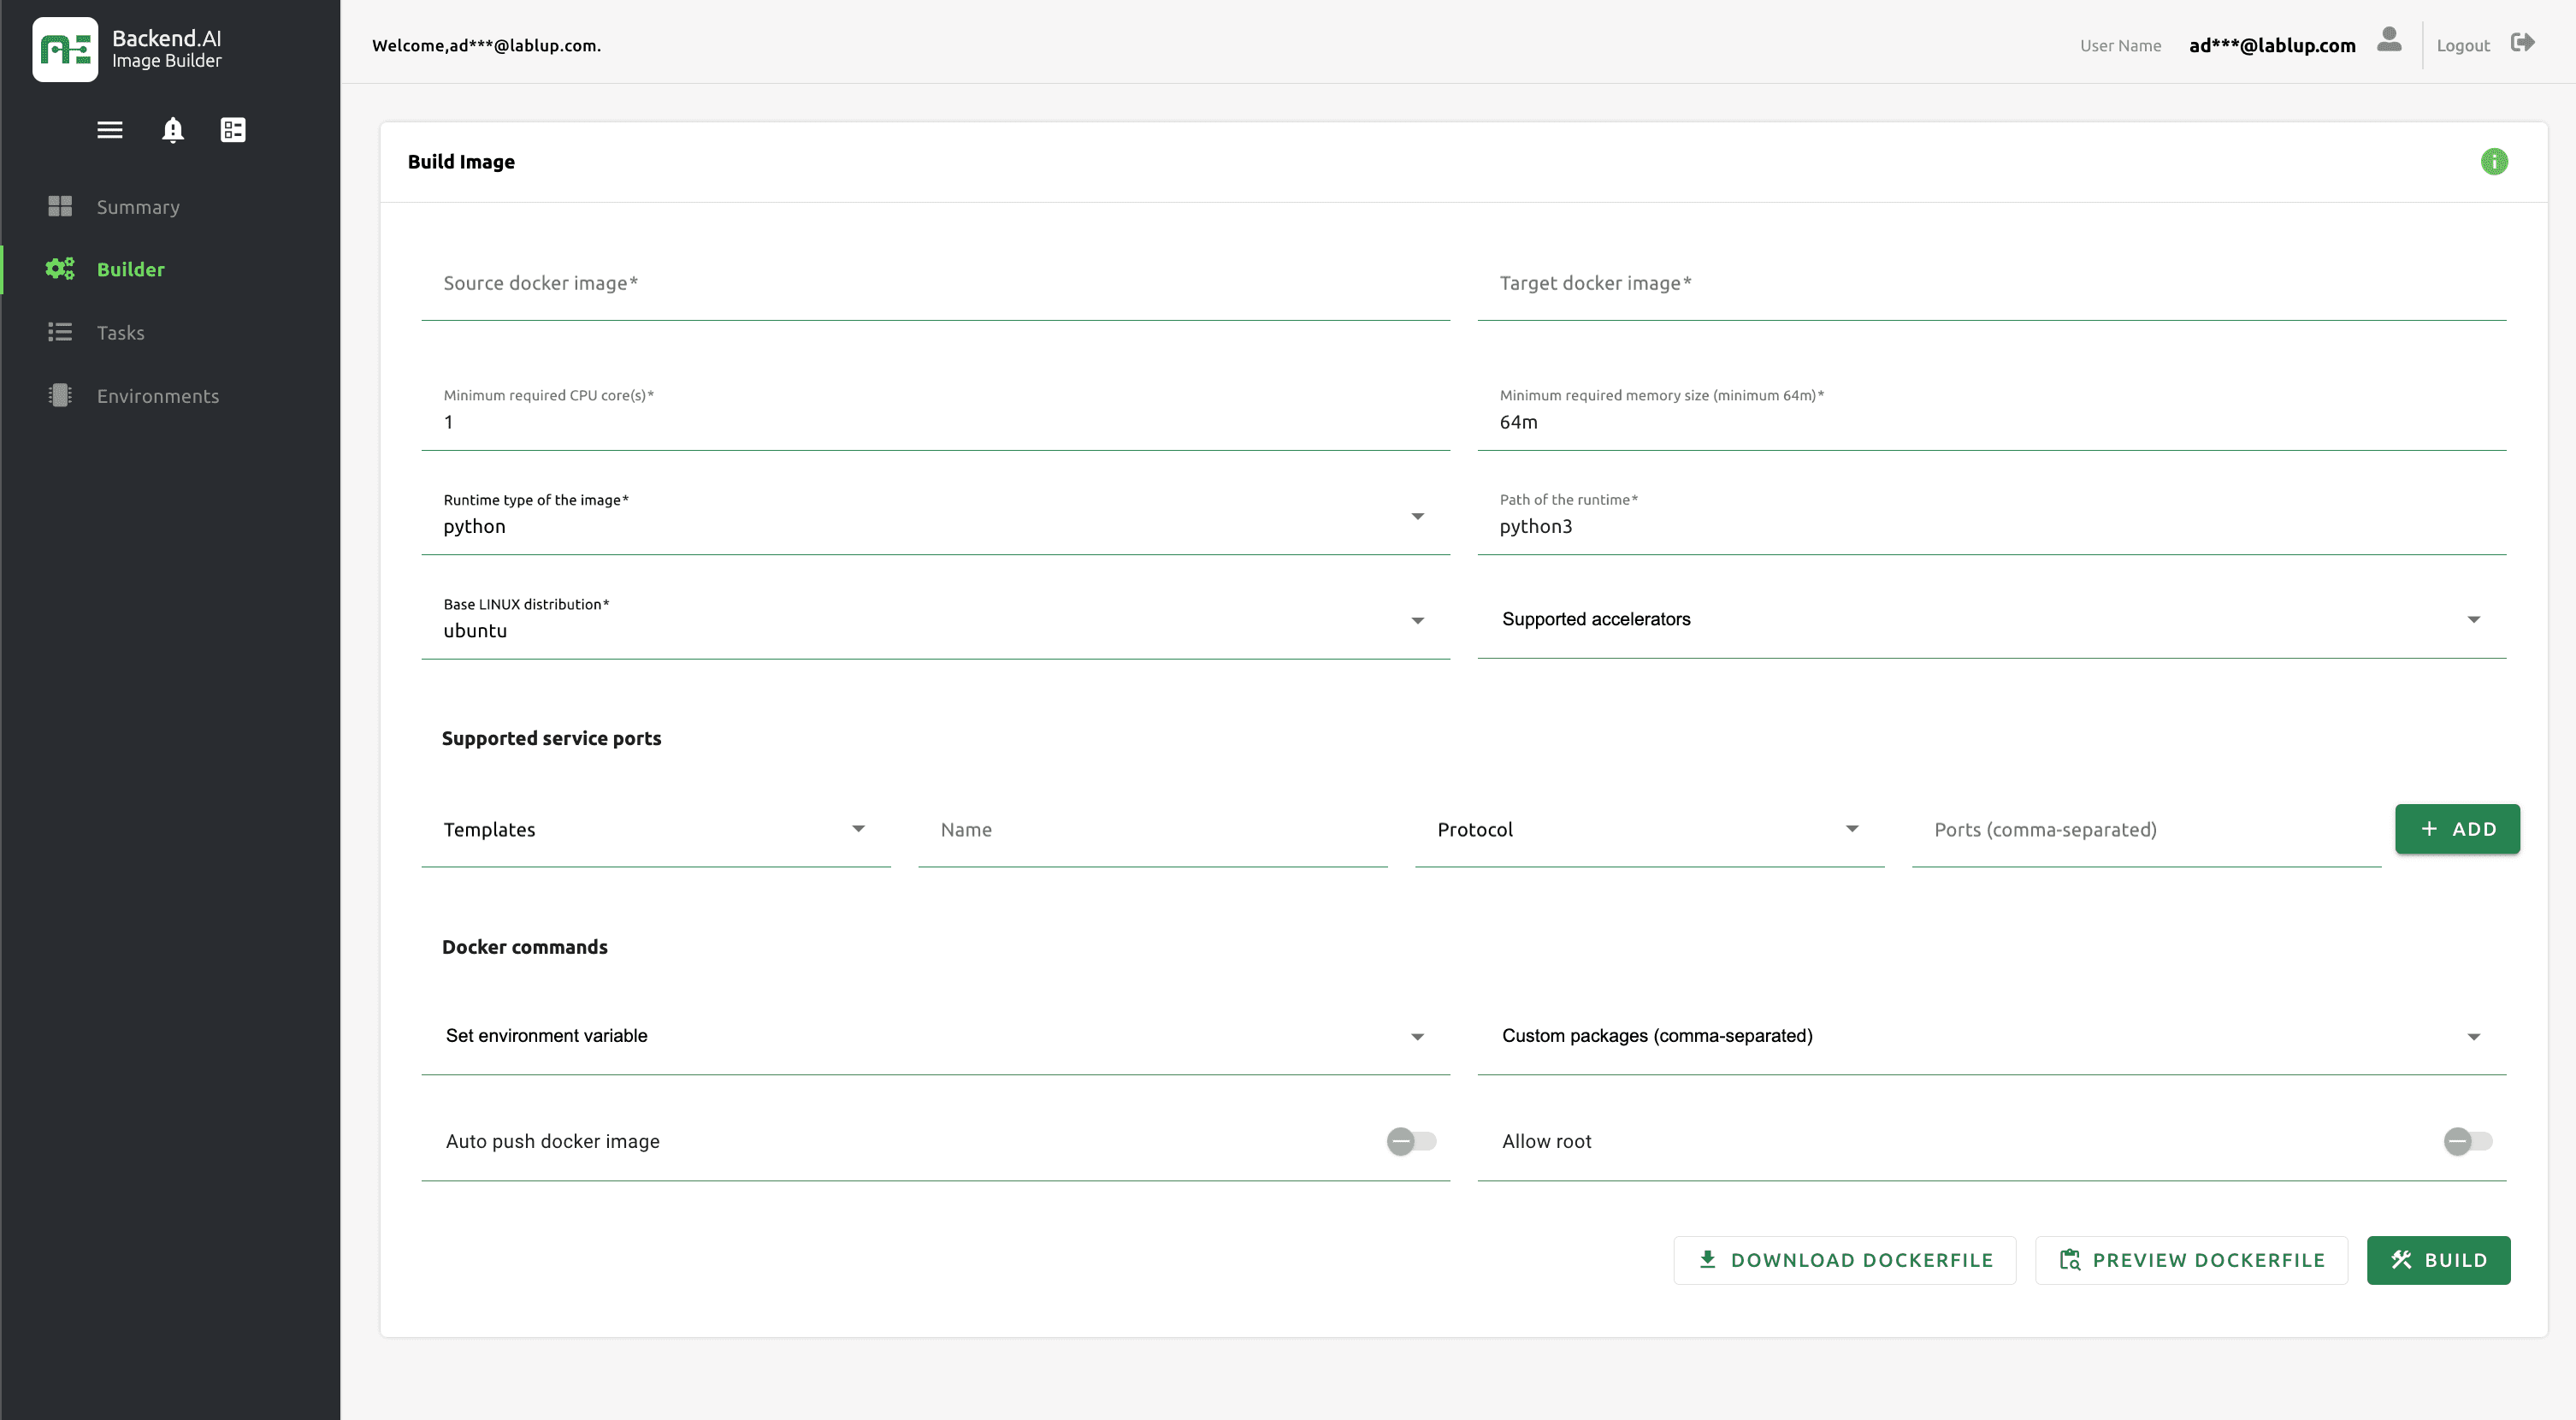
Enter the base image in the Source docker image field and the new image to be created based on the source image in the Target docker image field. For example, enter the full details like my.reg.com/test/ngc-tensorflow:19.07-py3 including registry (my.reg.com), namespace (test), name (ngc-tensorflow), and tag (19.07-py3). Depending on the image, a namespace may not be required. The source image must already be uploaded to the specified Docker registry (in this case, my.reg.com). (In the future, we plan to support using images that exist on the host as source images.)
You can build immediately with these settings, but you can also customize your image with several additional options:
- Resource constraints: Set options like
Minimum required CPU coresandMinimum required memory sizeto specify the minimum resources required by the image you're creating. - Supported service ports: When you specify a service port, it opens a specific service on a specific port of the container. Users can utilize services registered to service ports through the Backend.AI environment. For example, if you open Jupyter using the HTTP protocol on port 8080 of the container, users will attempt to connect to port 8080 when running the Jupyter Notebook app. Of course, if Jupyter is not installed in the image, only the container port will open but the service won't run.
- Set environment variables: You can add simple (non-array) environment variables to be used inside the container.
- Custom packages: You can specify apt/pip/conda packages you want to pre-install.
- Auto push docker image: With the
Auto push docker imageoption, you can push the newly created image to Docker Hub. The registry is specified as what you wrote in theSource docker imageoption. - Allow root: If you enable the
Allow rootoption, regular users can use thesudocommand to issue commands with root privileges.
Once you've completed all settings, click the BUILD button at the bottom to start the build process.
Check the image being built
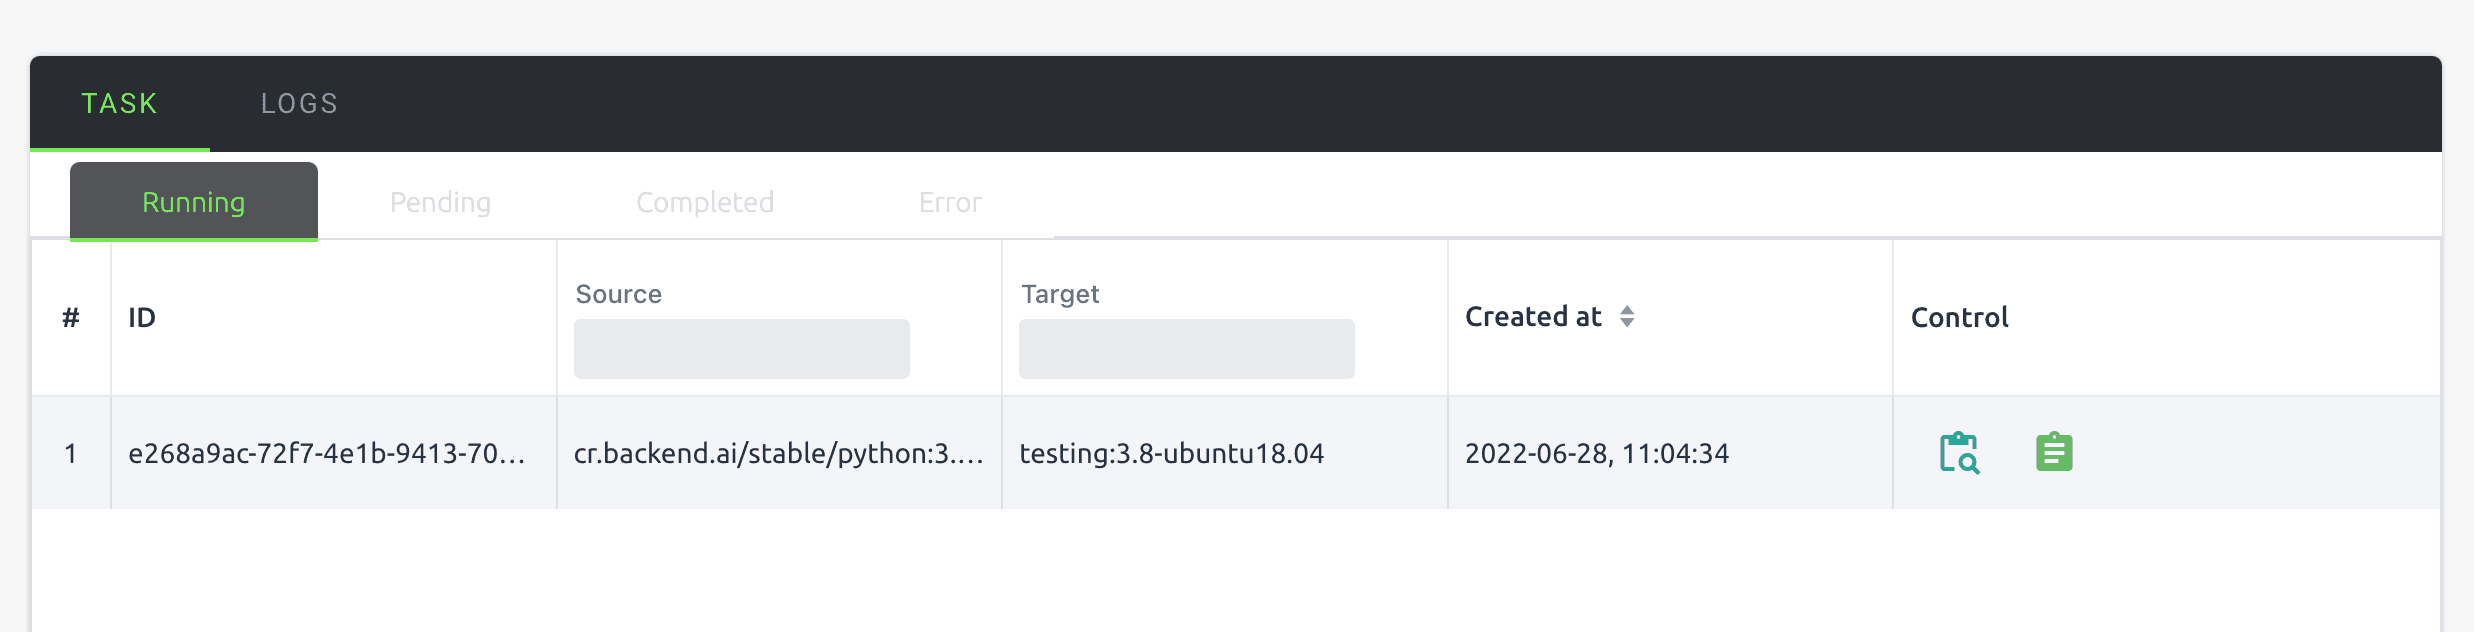
When you navigate to the Tasks page, you can check the status of your images in the TASK tab, categorized as 'Running' (images currently being built), 'Pending' (images scheduled for building), 'Completed' (successfully built images), and 'Error' (images that encountered errors during the build process). The image described shows what it looks like when building testing:3.8-ubuntu18.04 based on the cr.backend.ai/stable/python:3.8-ubuntu18.04 image.
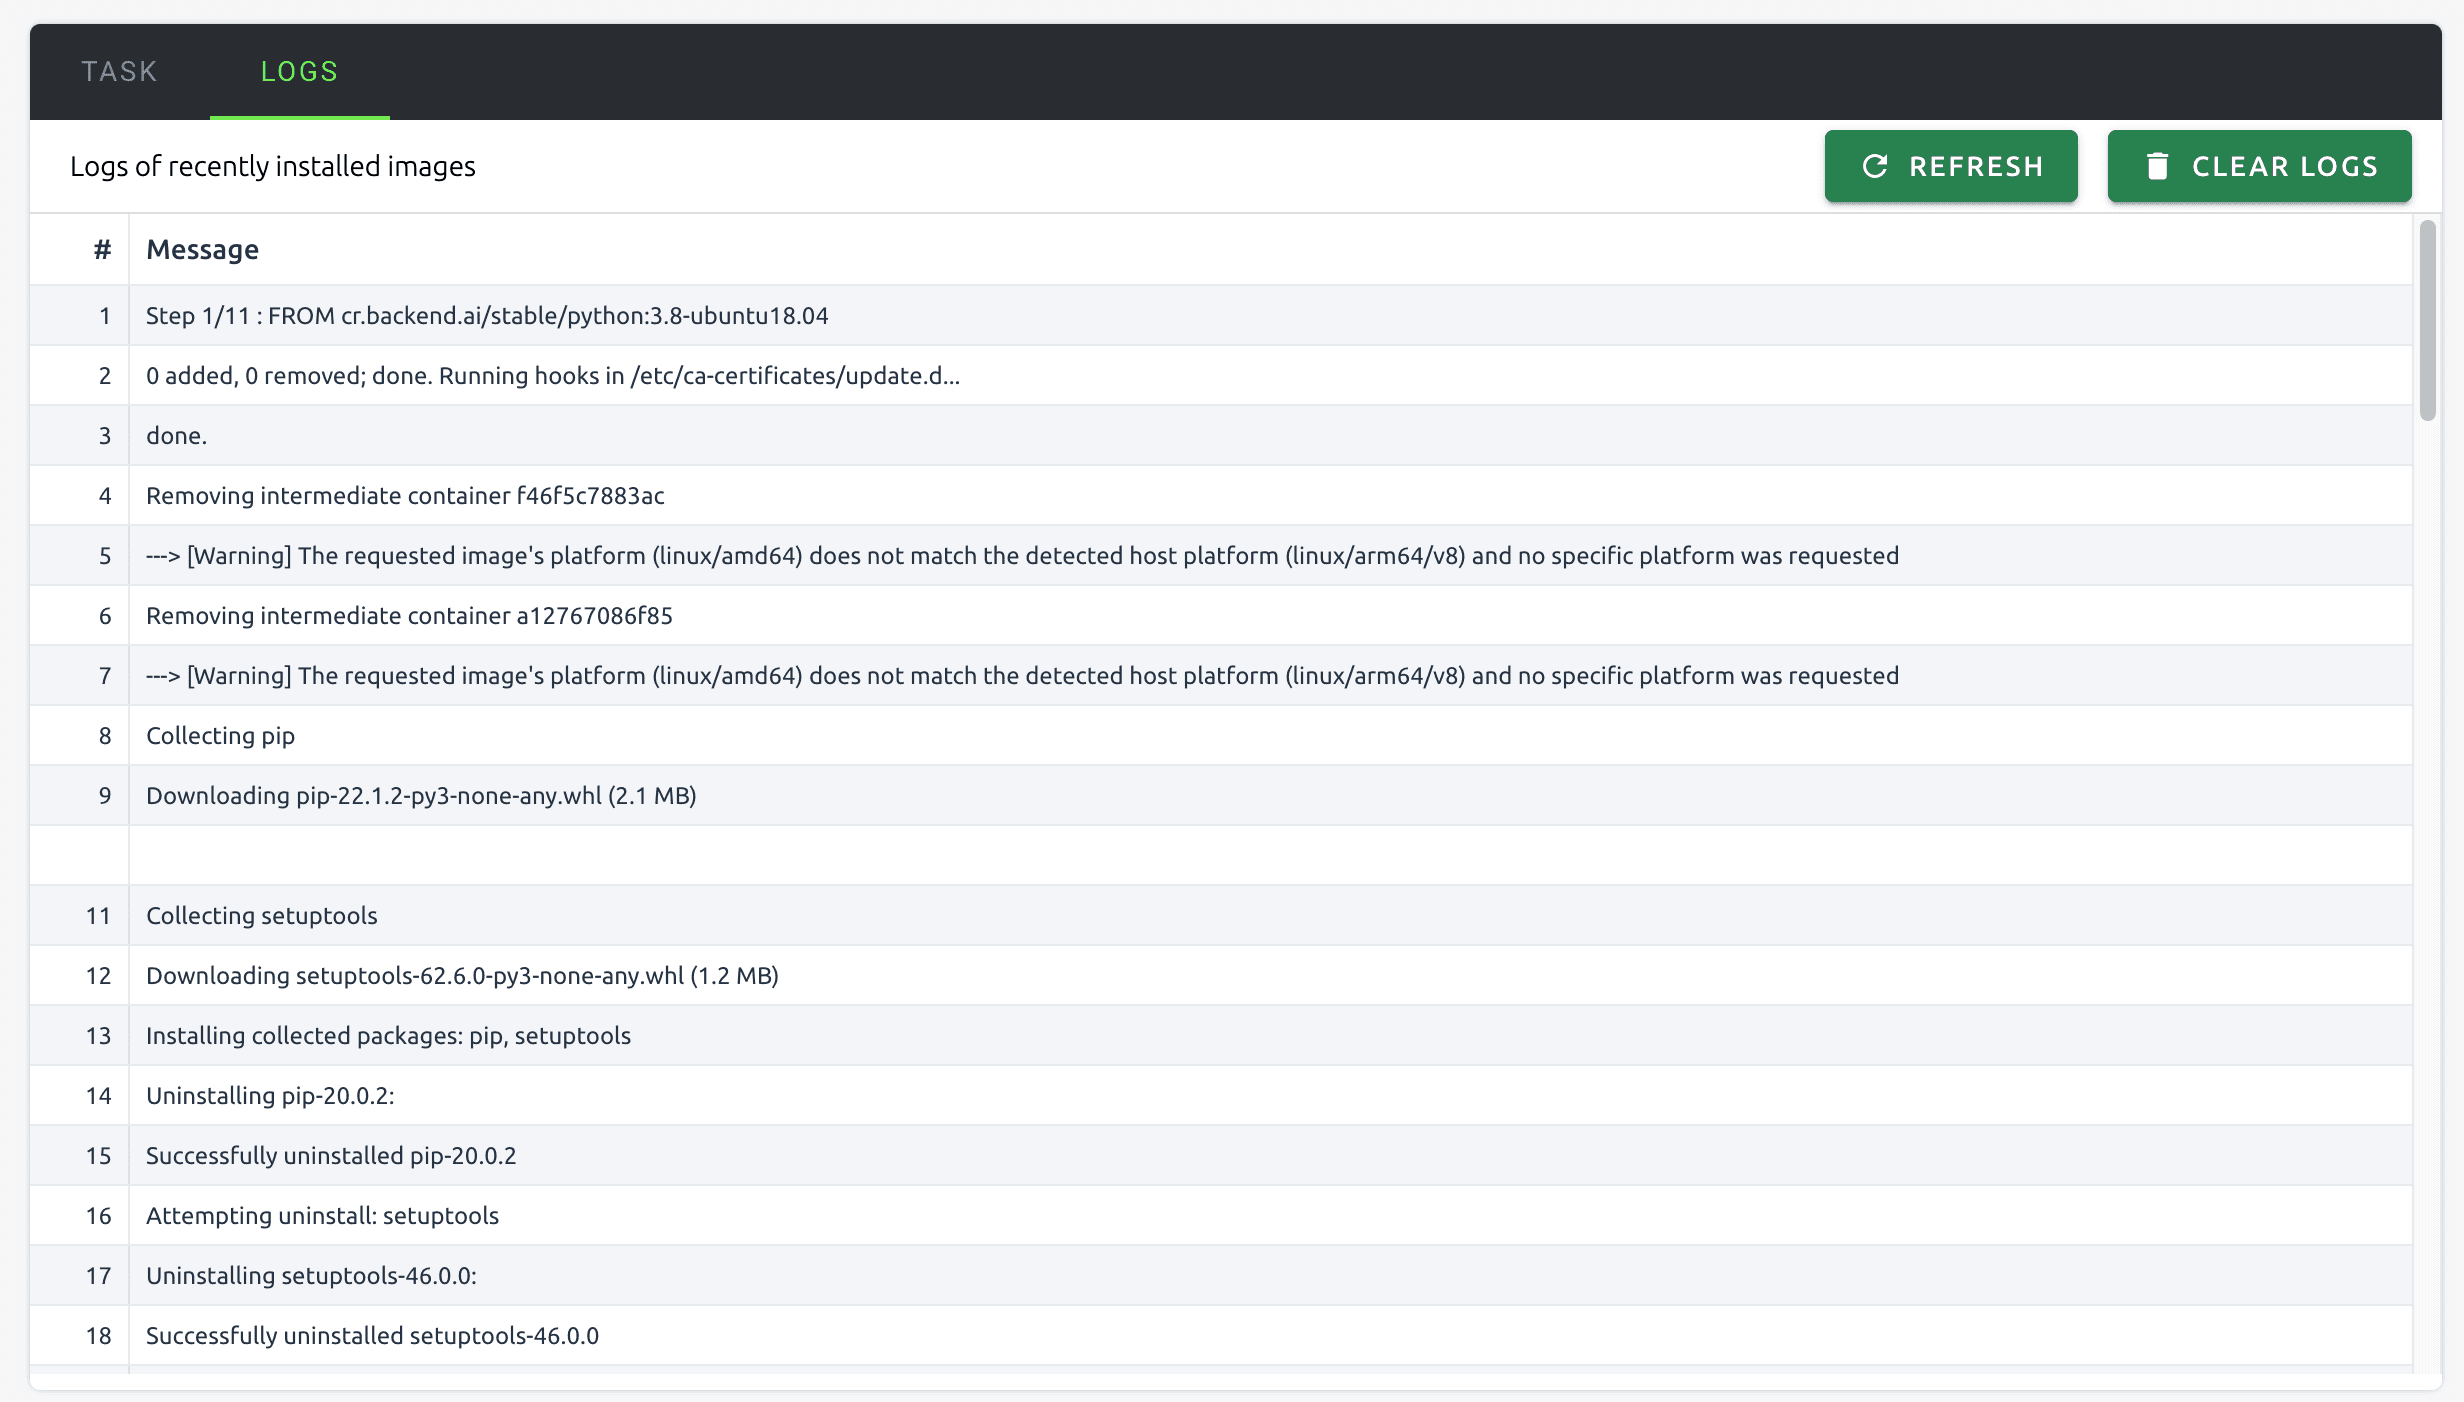
Tap the LOGS tab to see a live log of how the current build is progressing.
Since you requested an image build, the Tasks chart on the Summary page has been updated, and after the build is complete, you can see on the IMAGES tab of the Environments page that the image that was just installed has been added.
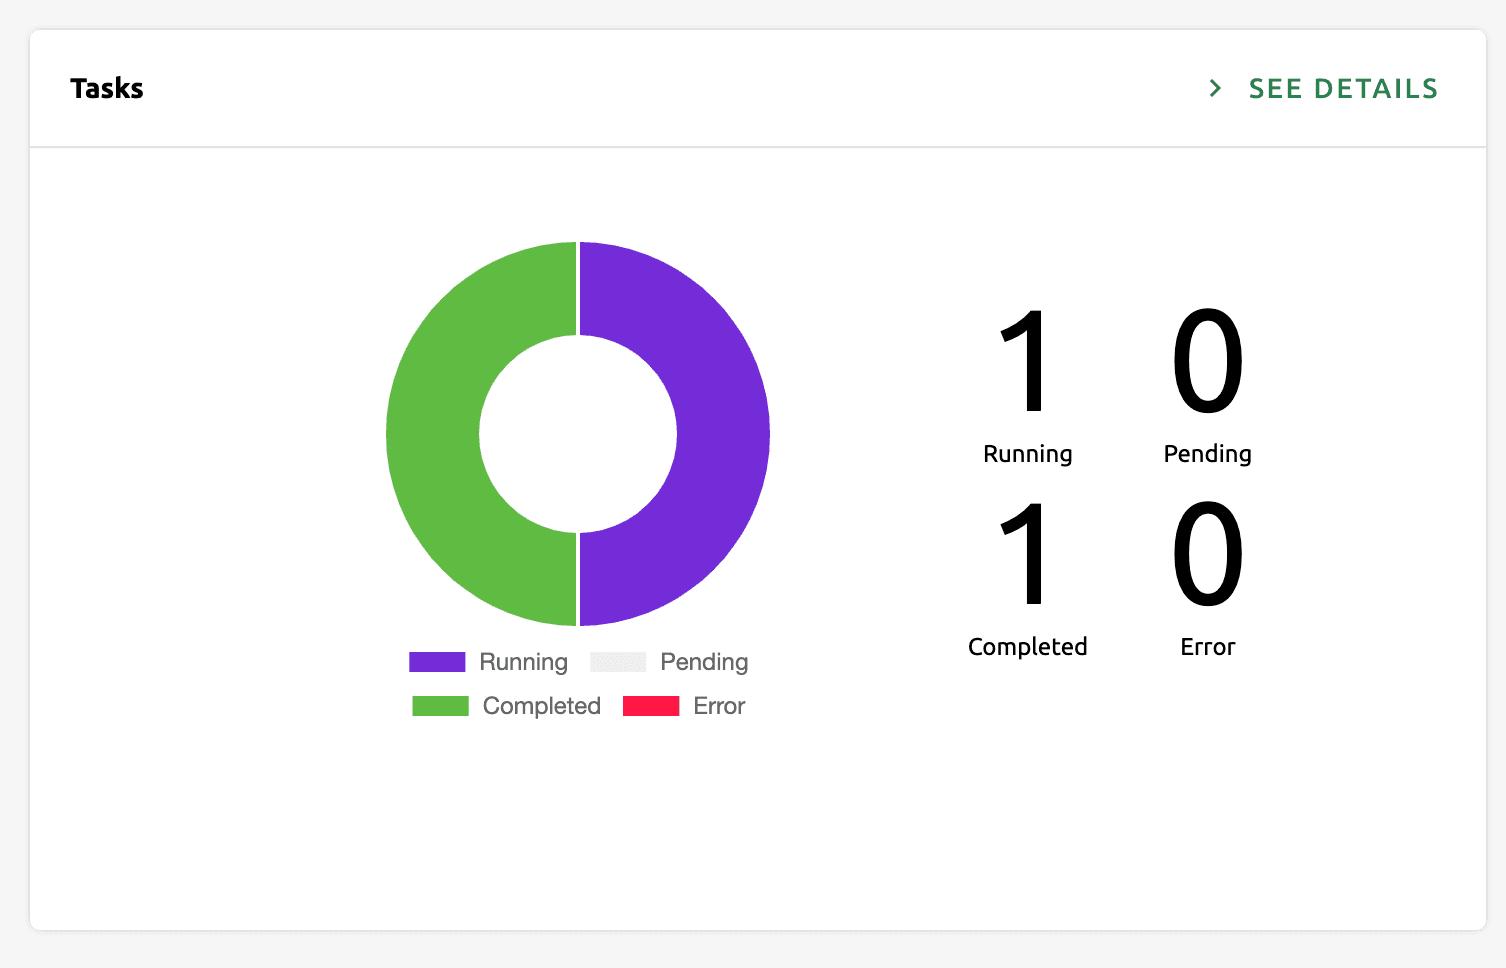
Summary page Tasks pane
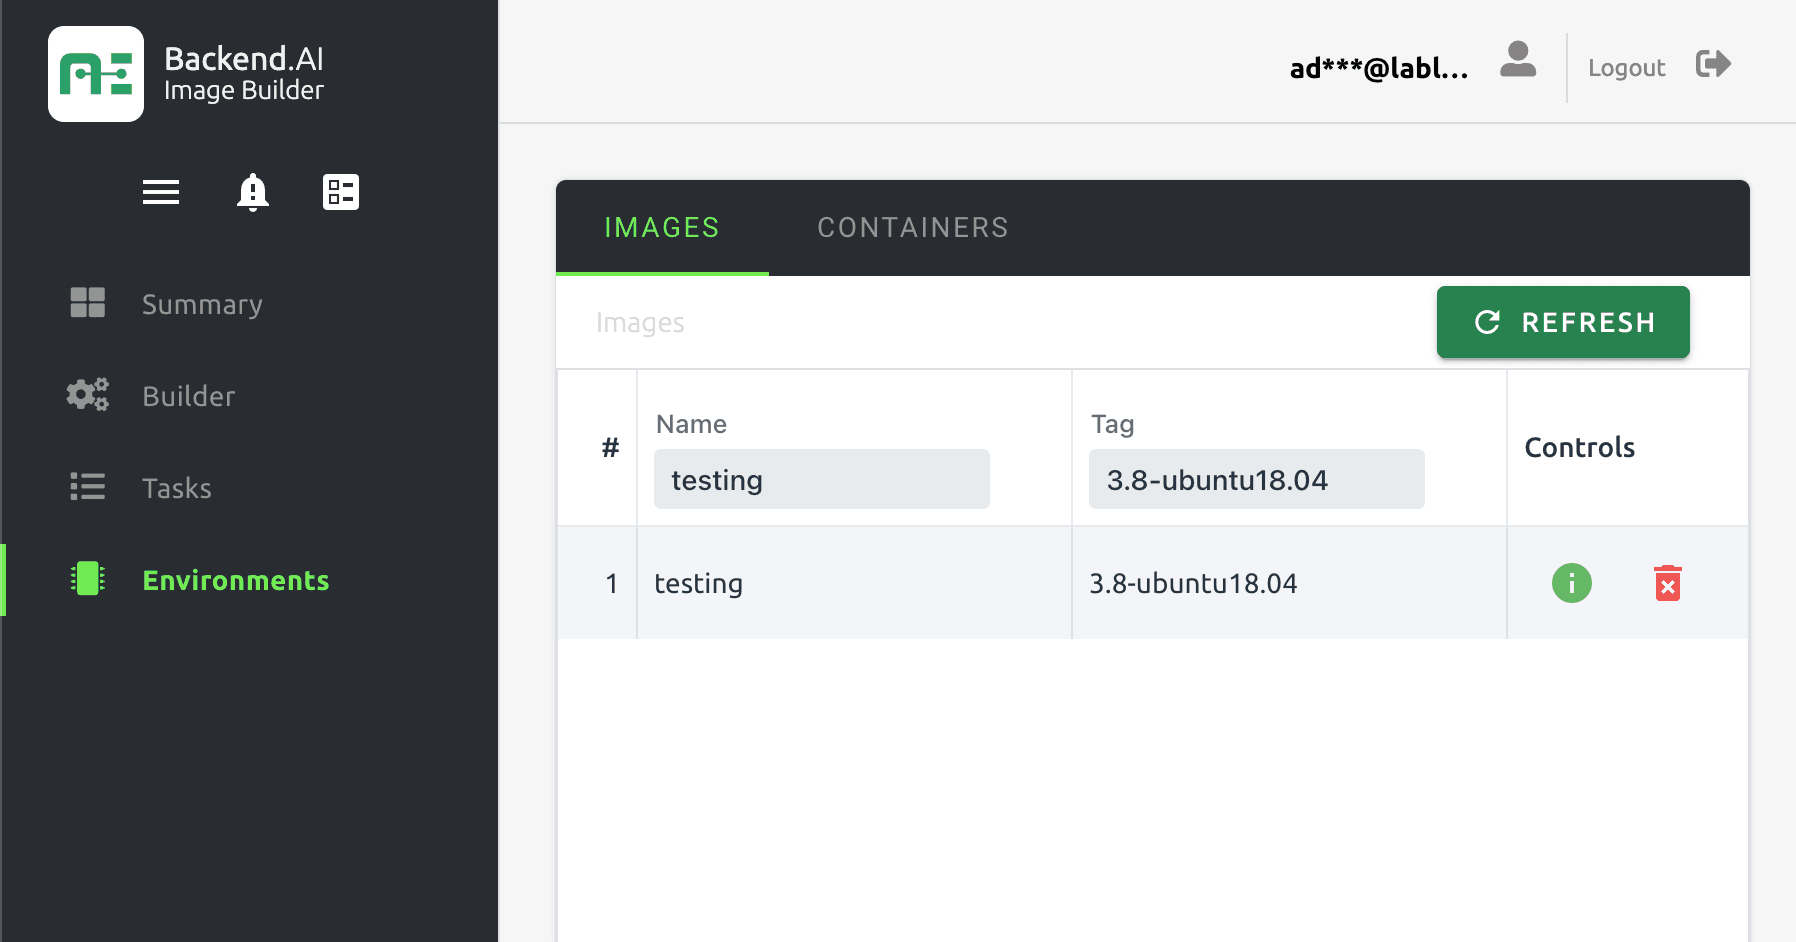
Environments Page IMAGES Tab
Building with OpenAPI
You can also use Forklift through OpenAPI without using the GUI. Forklift's server is built with FastAPI, which provides automatic documentation based on Swagger (OpenAPI) as one of its features. This makes it easy to use and test the API.
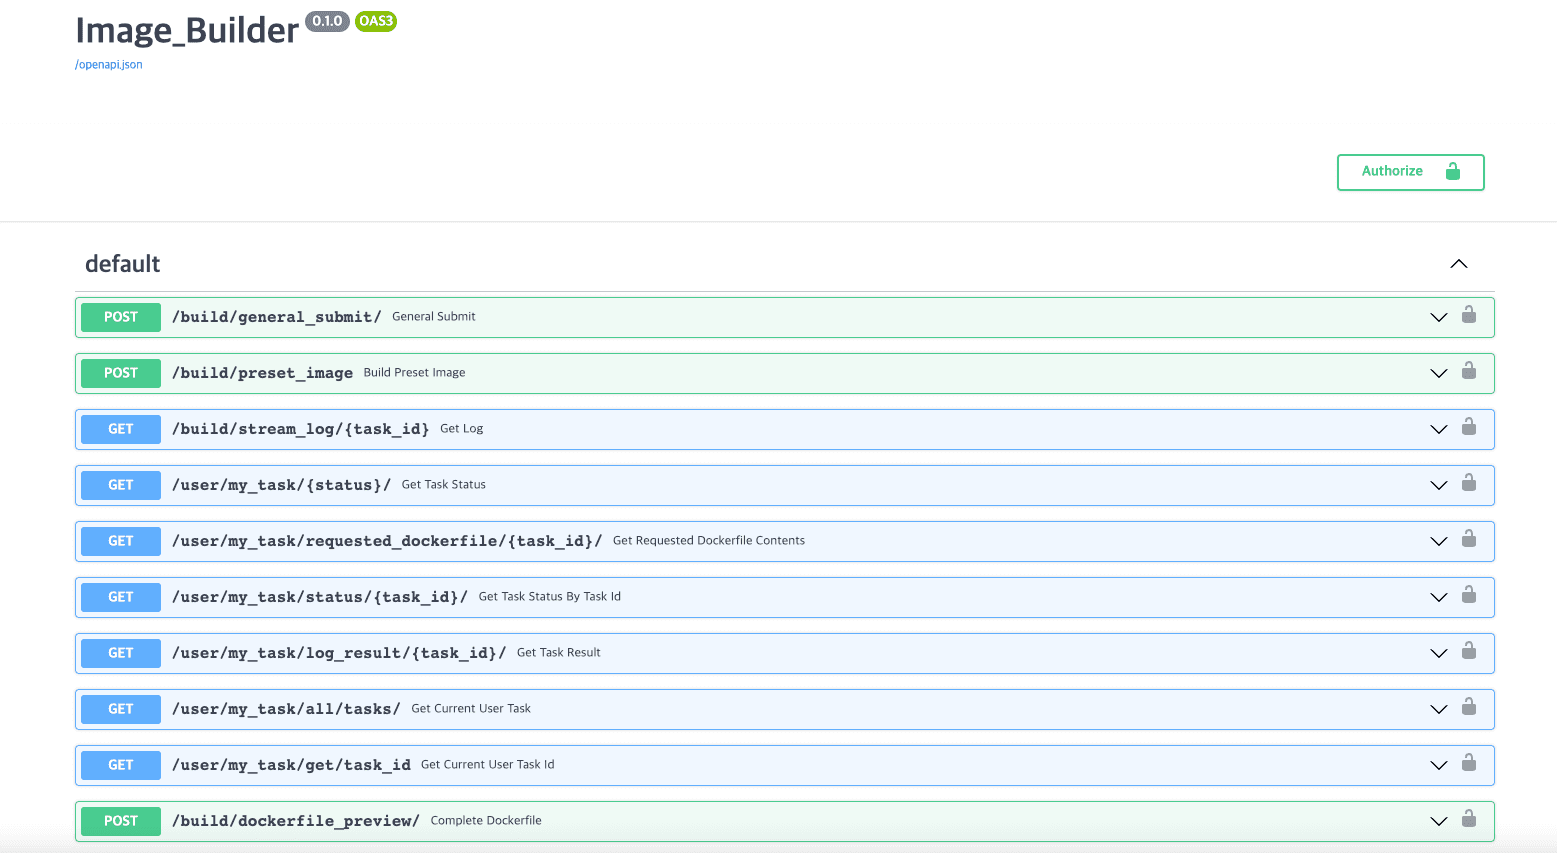
First, authentication is required to use the API. Although not fully visible in the image, you can register through the /register/ API to gain authorization for using the APIs marked with a lock icon. If you've already registered through the GUI, you can click the Authorize button in the upper right corner to log in with your existing account.
Now you have the permission to build images. To build images, you can use /build/general_submit/ and /build/preset_image/. The former allows you to customize and build images directly, similar to the GUI description earlier in the article, while the latter enables you to easily build images using preset images provided by Backend.AI without customization. Since /build/preset_image/ is still under development, let's take a look at /build/general_submit/.
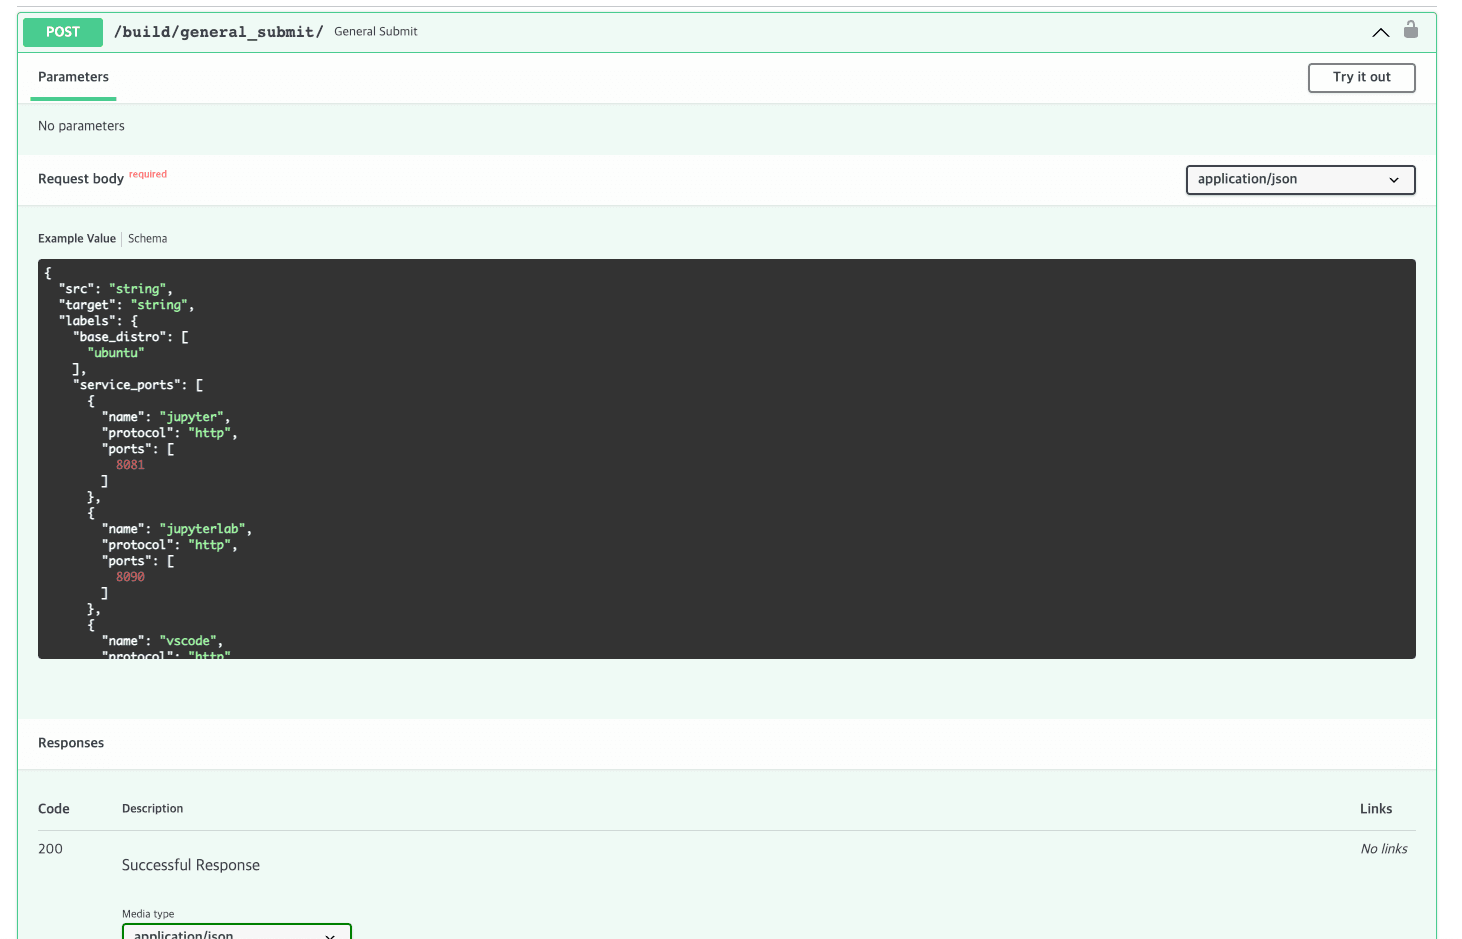
The request body contains the information the image build server needs to build the image, as shown below. We've already described each field above, so we'll skip over them.
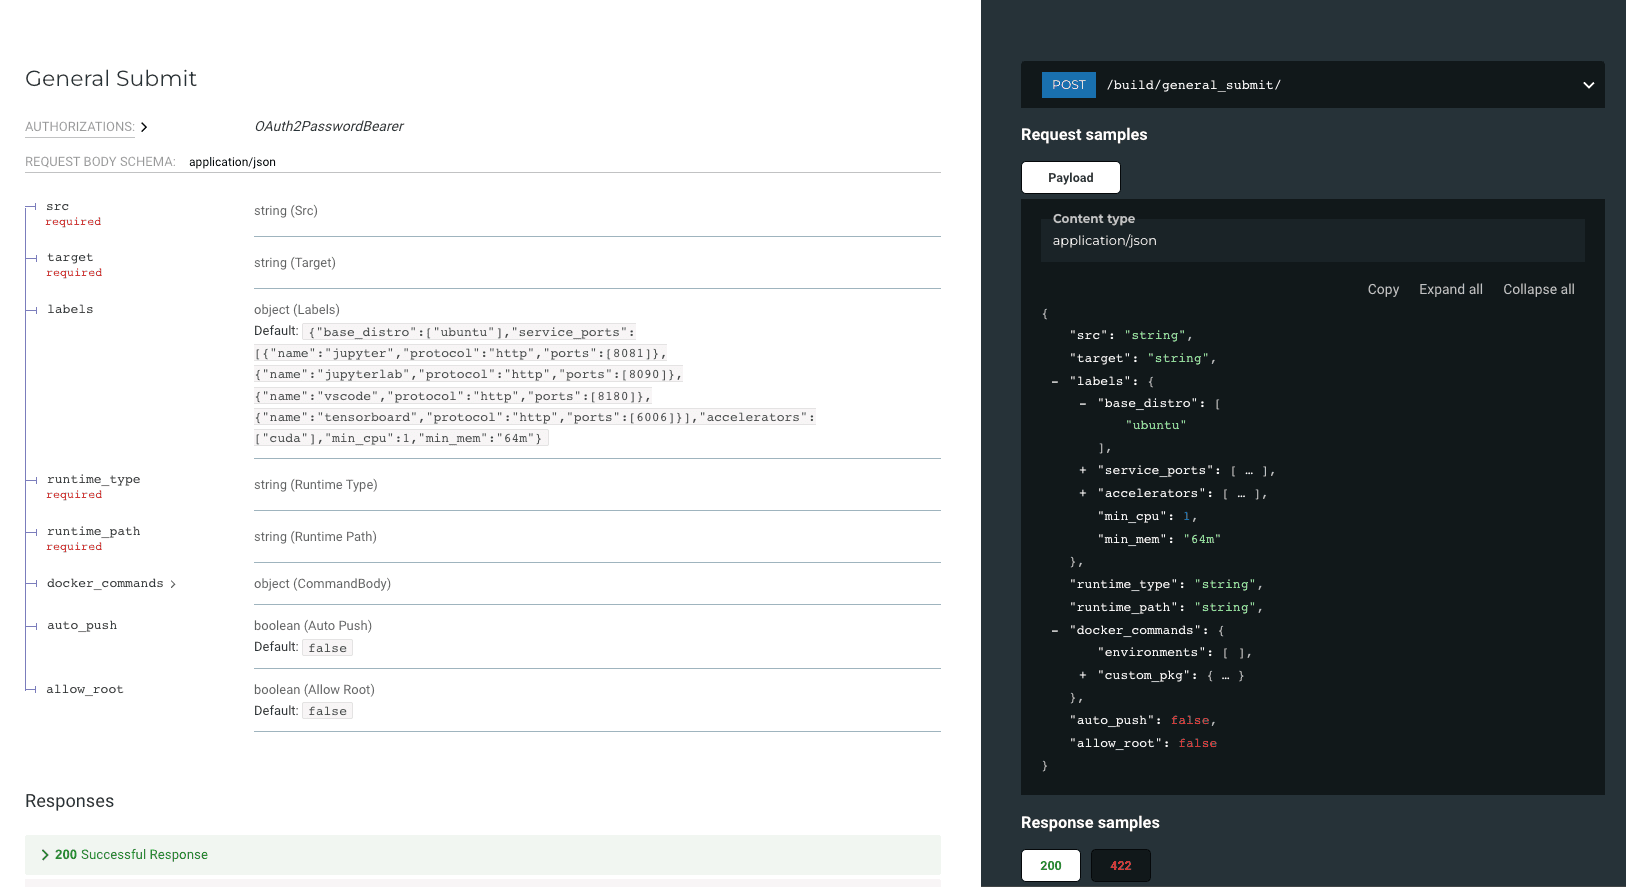
Click the try it out button in the top left corner of build/general_submit/ to customize the values for each field and click the Execute button to send a POST request to the appropriate route to start the image build server to build.
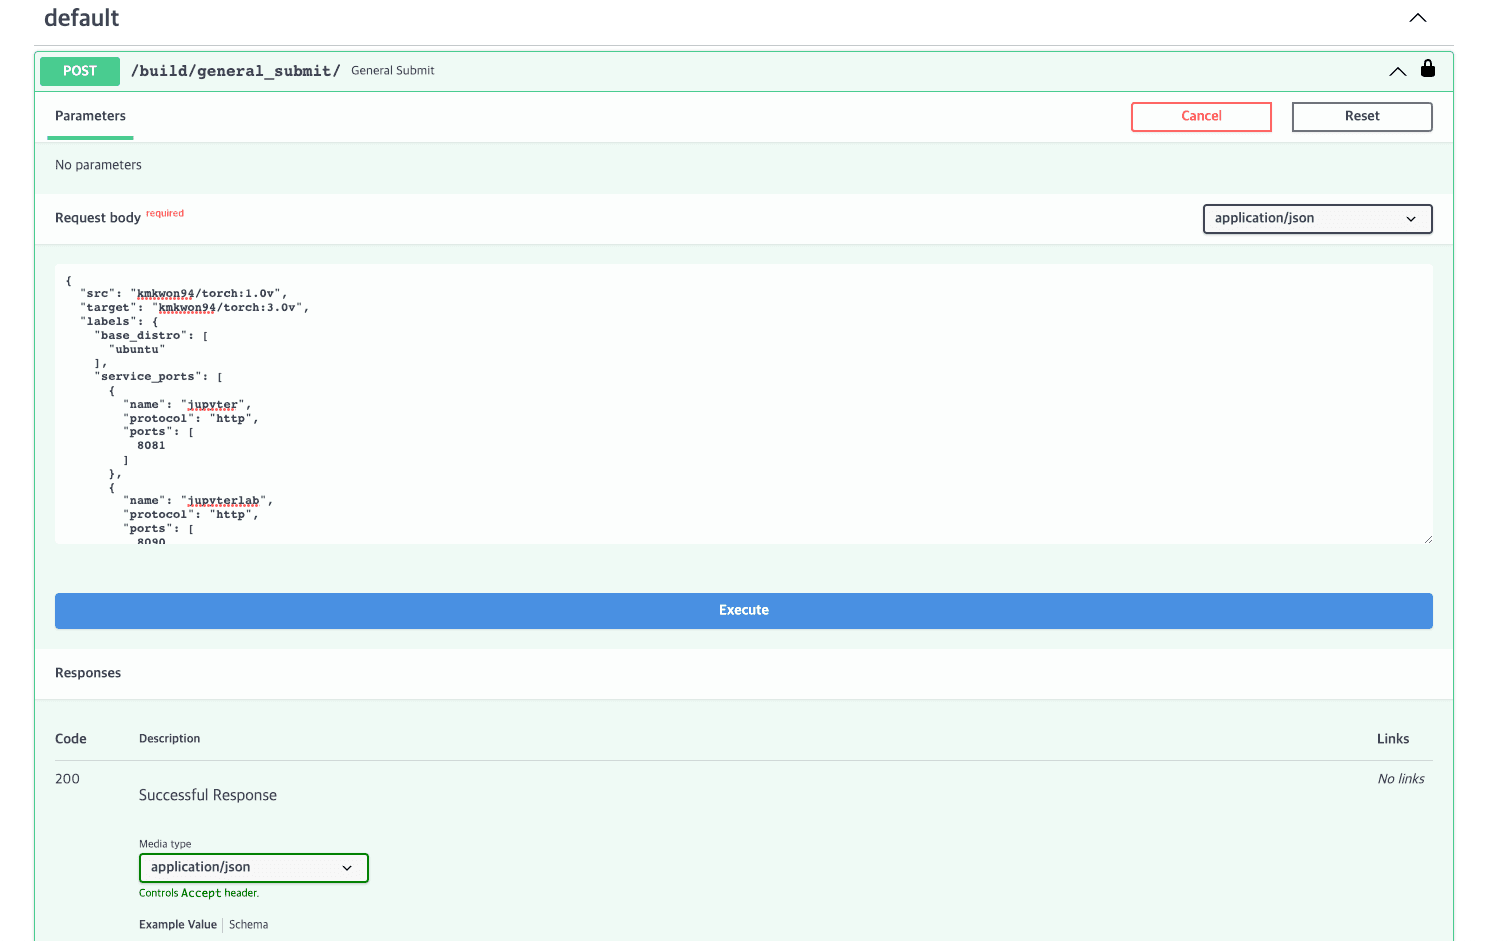
Detailed settings
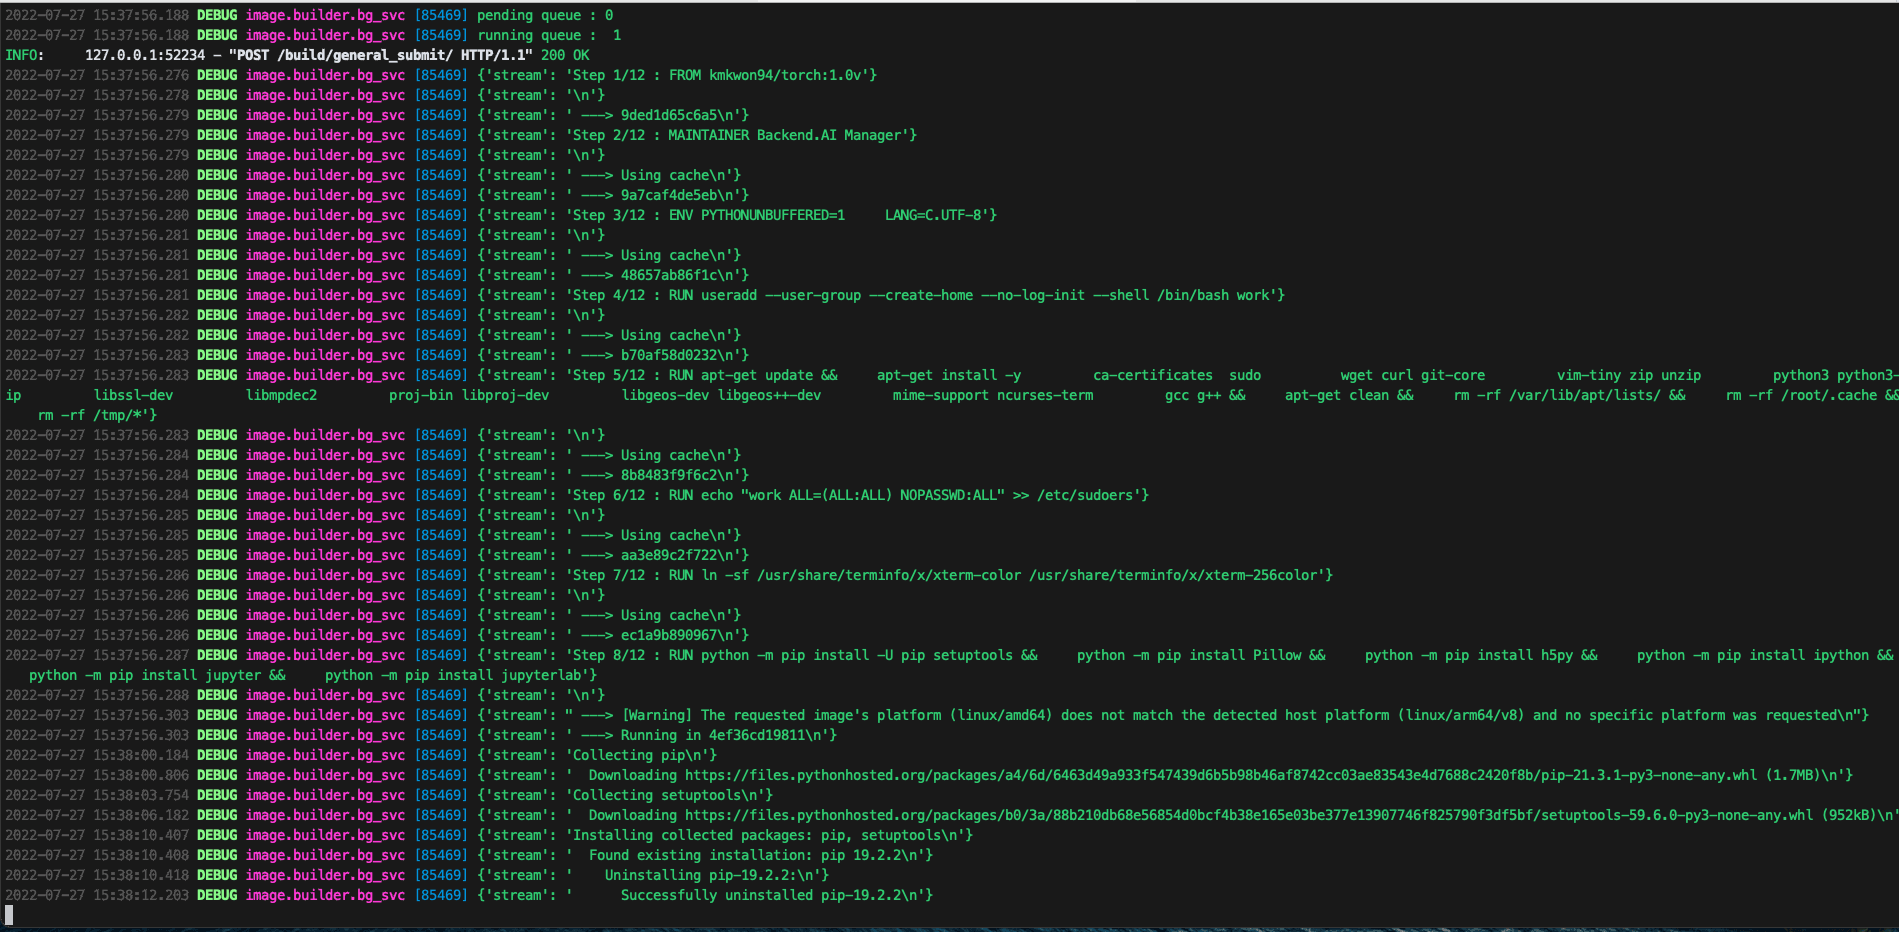
Build Process
Because the image build process happens as a background task inside the server, users receive immediate responses about the failure or success of their build requests.

Once the build is complete, you can view the built image via the docker images command.

Additional features include the ability to:
- Get status information and requests for image build schedules
- Preview and download Dockerfiles used to build images
- List, delete, and inspect images created on the host
- View the currently running containers
- Ability to commit containers
Wrap up
In this article, we introduced a brief overview of Forklift and how to use it through both GUI and OpenAPI.
To summarize, Forklift provides a service that automatically builds images for users by incorporating their existing images into Backend.AI, enabling them to use various features provided in computational sessions.
Lablup operates based on the philosophy of Make AI Accessible. Forklift also originated from our question based on our motto, "Shouldn't users be able to build images easily?" Although it's still a beta service, we will accelerate the development of various features to make AI research and deployment easier from the user's perspective.